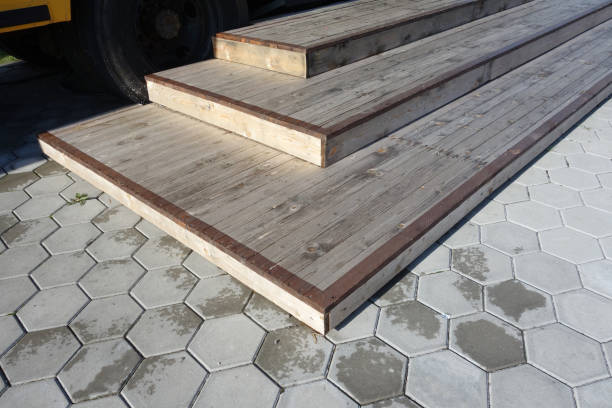
Wooden stairs can create an inviting patio, deck, or front door entrance. With a few basic carpentry skills, you can build wooden steps for your outdoor space in just an afternoon.
Notched precut stair stringers (22 dollars, Home Depot) remove much of the hard work of building wooden outdoor steps. The stringers are typically 7 inches high and 11 inches long. They can also be trimmed to fit the entry joist. These instructions will help you put your carpentry knowledge to good use by building a set of beautiful wooden steps.
For building outdoor wooden steps, you need a level and clear area. Remove shrubs and other plants from where you will place the actions, whether next to the house, on a porch, or deck. Level the ground, and fill in low spots using fill dirt. This will allow the area to slope away from the home.
It used to be challenging to construct a wooden step set. This was due to the detailed measurements and the numerous angle cuts required to create the stringers with notches that supported the treads and riser board. The precut stringers in home centers and construction supply stores make the task much more accessible. The stringers are typically cut to fit a standard tread 11 inches wide with a rise of 7 inches per step.
The height of the step from the top to the ground should be measured. Calculate the number of stairs you’ll need. Allowing for a rise of 7 inches per step, do this. Compile a materials list once you have determined how many required steps. Materials include stringers at both ends and one stringer every 16 inches between them, treads, risers boards, a 2×4 inch anchor board, corrosion-resistant screws, or nails. All materials must be pressure-treated or made from rot-resistant material.
Attach a 2×4 inch anchor board on the side of your house to support stringers. Measure the width of the door’s opening and subtract 3 inches from the stringers attached to each end. Cut the anchor board to length after squaring up one end.
Screw the anchor board into place. Assure that it is level with the home and centered over the doorway. Drill pilot holes for anchors and masonry screws with a masonry drill bit before attaching the anchor boards to concrete or brick.
Position the stringers to flush against the top of the anchor board. Ensure that the step notches and stringers align with the house. Under the bottom of the strings, you can place bricks or concrete blocks to raise them off the ground. This will also provide a level base. After installing the stringers, you can nail them to the anchor board.
Cut 1 1/2 inches from the back of each middle strand to allow for the thickness anchor board. The cut should be parallel to the existing angle cut. Toenail intermediate stringers flush to the anchor board.
The 1×8-inch riser boards should be cut to the same size as the step framing at the point where it connects to the home. To tie the step framing, nail a riser at the lower end. Attach the riser flush to the top of each step notch.
Cut two 6-inch wide treads for each outdoor wooden step. To allow for an overhang, add an inch at each end. Two tracks per wooden step can reduce the risk of cupping and cracking.
Place the wooden treads onto the stringers and screw or nail them into place. Ensure you allow enough overhang at the front of each riser to accommodate the thickness.